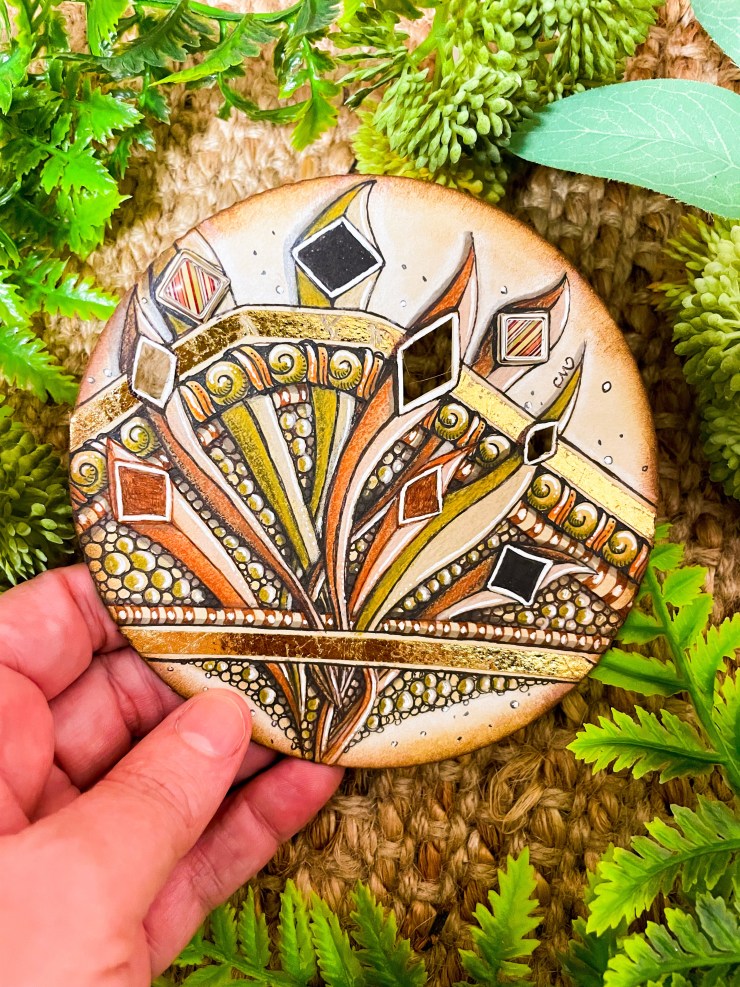
Hi and welcome back to the Chrissie Murphy Designs Blog. In November of 2017, Zentangle launched their first Project Pack. Now, four years later, Zentangle have just released Project Pack 16. It’s the first Project Pack I have ever purchased or participated in. Today I am going to share my 12 Days of Zentangle from Project Pack 16 and my thoughts on this great global event.
Project Pack 16 focused on Keeping Score
What a joy it was to receive my Project Pack 16 in the mail. I was so excited to see what it contained, I opened mine straight away.
It contained two tools that I thought were interesting – a scoring tool and some Mod Podge.
As we got underway, Project Pack 16 introduced us to “dimension”. The scoring tool was used to score tiles which enabled us to fold them in varying ways.
We also used it to emboss out tiles creating texture on an otherwise smooth surface.
Project Pack 16 saw us using mod podge to glue tiles together in different ways to create dimension. We also used it to seal our work and I really love the gloss it gives a tile when dry.

Lots of video…
Every day for 12 days, Zentangle HQ released a new Project Pack video. I got into the habit of watching mine in the morning over toast and a cup of coffee, but because I was unable to complete a project each day for 12 days, I had to come back and rewatch them later.
All of the Project Pack 16 videos are available to watch on YouTube here if you’d like to give it a go.
My 12 Days of Zentangle
Day 1
Day 1 of Project Pack 16 focused on Pangea and Mrth, a reticula and fragment pattern that Zentangle recently developed. We learned how to flip and rock a tile!

Day 2
In Day 2 of Project Pack 16 we focused on Paradox, and we worked on two tiles. These were then scored, folded and glued to make a beautiful box. I chose to add some beads and ribbon to hang mine.

Day 3
In Day 3 of Project Pack 16 focused on embossing. We used the scoring tool to emboss our tiles. I really struggled with shading this technique and it’s effect is quite lost in my tile.

Day 4
And Day 4 of Project Pack 16 saw us using the scoring tool to make a cone shaped tile. These were perfect for Christmas, and I coloured mine to resemble a Christmas Tree. Again I added a bead and some ribbon so it could be hung.

Day 5
I was doubtful with Day 5 of Project Pack 16. We used water and the back of a spoon, to indent our tiles. I really doubted the effectiveness of this technique, and was amazed when it dried with a gorgeous dome shape in the middle of my tile. I had fun using gold in this tile too. It’s one of my faves from the pack.
Day 6
Day 6 of Project Pack 16 saw us using our scoring tool and glue again to create a dice out of two Zentangle tiles. I put some wooden beads inside mine to give it a rattle when it’s rolled. I love the colour of this so much!

Day 7
So Day 7 of Project Pack 16 was my favourite project from the pack. I couldn’t wait to try Crazy Cubine as I loved the look of it from the moment I first saw Maria’s video. I continued the gold theme with this tile, using gold foil, and I added more dimension by using some beads as Cubine fillers.

Day 8
In Day 8 of Project Pack 16 we used four bijou’s that were glued together and then cut to assemble this lovely hanging ornament.

Day 9
In Day 9 of Project Pack 16 was a tile that had us paying attention. We drew Mooka on top of a Pangea Reticula to then play with it so it appeared behind. This was a fascinating project and one that commanded my full attention!

Day 10
So Day 10 of Project Pack 16 saw us working with Auraknot. I hadn’t used Auraknot in years and loved revisiting it here.
When this tile was complete, we glued Day 9 and Day 10 together to form a hanging ornament which I love and shared a video about here.

Day 11
In Day 11 of Project Pack 16 we were back to using the scoring tool to fold our tiles. We used two tiles to create a beautiful three dimensional piece.

Day 12
And Day 12 of Project Pack 16 saw us use two tiles again to create a spinning top. I explored some new shading and colouring techniques with mine and love the craziness of the colour.
To the big question…. Will I ever do a Project Pack again?
Absolutely, I am SOLD. And I have just started Project Pack 1. I was so unimpressed with my Day 09 piece, that I decided I needed to focus on working with white on black. Project Pack 1 focuses on this heavily.
I will be participating in all Project Project Packs from now on. It was a fantastic experience and I can’t believe it took me so long to be involved!

Want to be more Expressive?
Come and Zentangle and Journal with me!
When you sign up to the Expressive’s List you will receive an email each month that’s full of creatively inspiring stories and ideas. You’ll also receive a month’s worth of journal prompts that are designed to kickstart your creative expression.
I can help you to express yourself creatively if you’ve never really tried it before. Fill in your details below to sign up.
Until next time, listen to your heart and sharpen your coloured pencils. A masterpiece awaits!
Bless you my friend
Chrissie xx
